What this guide helps you do
Configure the storefront's hero, story, featured products, gallery, visit information, contact form, reviews, call to action, footer, and button wording where your theme supports them.
Before you start
You need Edit design permission. Choose a theme before arranging content, because themes expose different fields. Prepare short text, public contact information, and a valid location embed if using a map.
Where to find it
Visual Editor → Page sections, Buttons, Contact, Opening hours, or Map / Location. On a phone choose the section through the editor's navigation.
Step by step
-
Choose a page section and read its available fields. Use its visibility switch only if you want the section shown.
-
Write the Hero headline/subtitle and Story text in the offered fields. Keep the first line useful to customers rather than repeating the store name everywhere.
-
For Featured, choose existing products with Add featured item/product. To change those products themselves, use Partner.
-
For Gallery/Lookbook, add allowed images, order them, and remove old selections. This gallery is separate from a product's photos.
-
In Visit/Store info and Contact, enter public phone, WhatsApp, email, address, links, and descriptive text where offered. Check each link in the preview.
-
Enable Contact form only if you want customer messages. Submitted messages appear in Partner's Messages; this is not a live chat.
-
In Map / Location, use the requested Google Maps share/embed information. A location is visible when a valid map is configured; there may be no separate visibility toggle.
-
Open Buttons to edit Submit button text, Add button text, Primary/Secondary button labels, and the CTA label where available. Keep each label clear about its action.
-
Configure the Submission page sections separately if you want to change how order details are presented.
-
Review the complete page on phone and desktop, Save, and inspect the live links and visible sections.
Understand the choices
-
A visibility switch affects presentation. It does not delete products, reviews, or received messages.
-
Opening hours and Location are dedicated settings, even when their information appears inside the Visit section.
-
Some themes always show core Navigation, Menu/Product grid, and Footer. A missing hide switch is deliberate.
-
Required contact-form fields and the displayed success state follow the app's actual configuration. Avoid promising immediate replies unless your team can deliver them.
Check the result
Each enabled section appears in the live layout where the chosen theme places it. Contact links work, the map opens the intended location, and the buttons describe their real actions.
If something goes wrong
-
A field/section is absent: check the theme-specific guide; not every theme uses every blueprint field.
-
The map is rejected: use the supported Maps embed/share URL and complete the field rather than inserting arbitrary website HTML.
-
A featured item is unavailable: check that product's visibility and availability in Partner.
-
Contact messages are missing: confirm you saved/enabled the form and are viewing the right store's Messages.
Screenshots
These screenshots use demonstration data. Your names, amounts and available controls may differ. Current values on your own screen take priority.
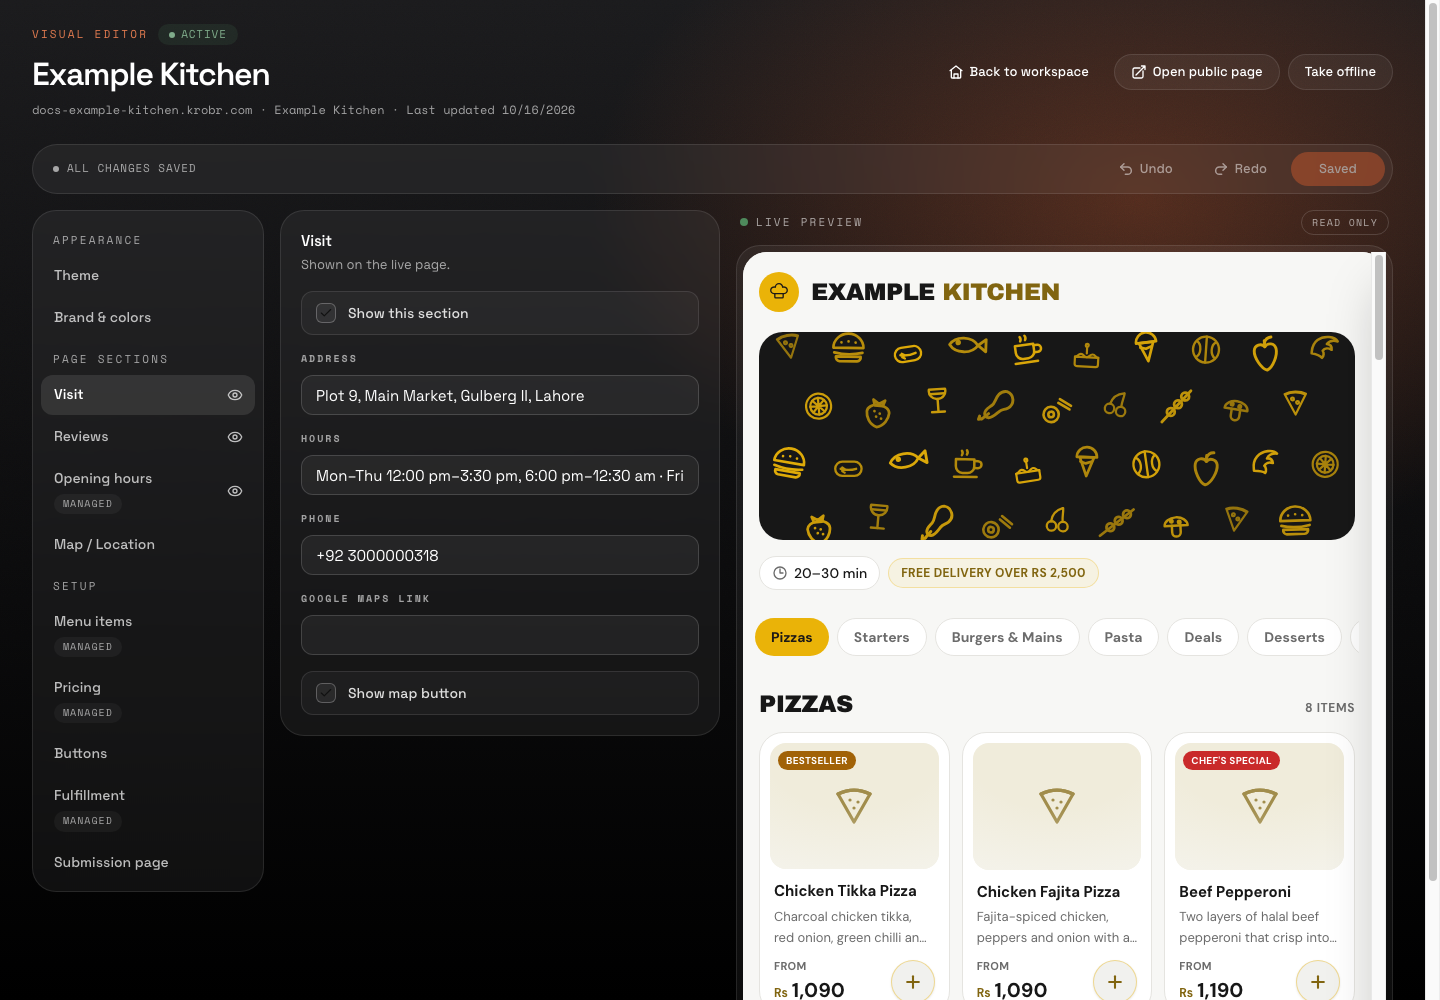
Edit page sections, buttons, contact details, and maps: find the controls in this example screen and follow the numbered instructions above.